Installation Steps
for setting up your
AquaPro 190 cartridge filter
Learn how to setup your AquaPro 190 Cartridge Filter System with this step-by-step guide.

The following article will describe and illustrate how to set up your AquaPro 190 Cartridge Filter System.
Check Contents
The first step for installing your AquaPro 190 Cartridge Filter is to check the contents of the box and make sure you have all the necessary components. The following contents are included in the box:
- Filter Tank (cartridge is inside the filter tank)
- (2) 6ft Hoses
- (2) Shut Off Valves
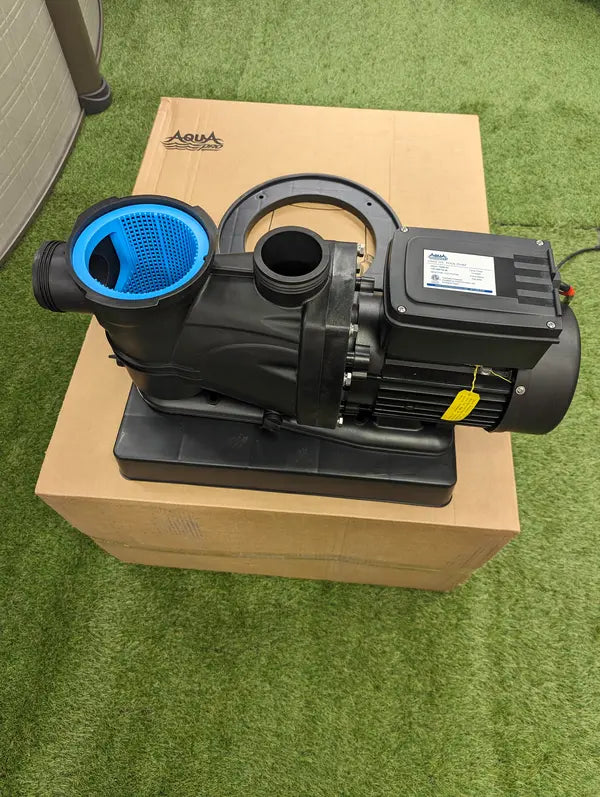
- AquaPro 2HP 2-SPEED PurFlo Above Ground Pool Pump
- Filter Base
- Accessory Bag

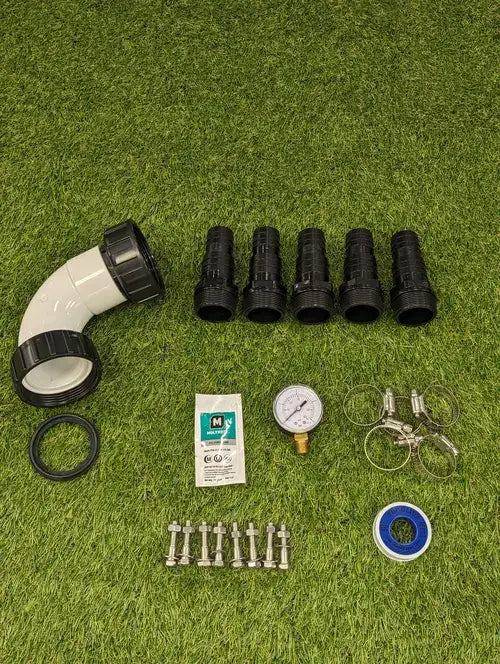
Check Contents of Accessory Bag
The following contents are included in the Accessory Bag:
- Pump to Filter Unionized Elbow
- Gasket for AquaPro Pump To Filter Unionized Elbow
- (5) Universal Hose Barb Adapters
- Pressure Gauge
- (5) Hose Clamps
- O-ring Lubricant
- (8) Bolts, nuts and washers
- Teflon Tape
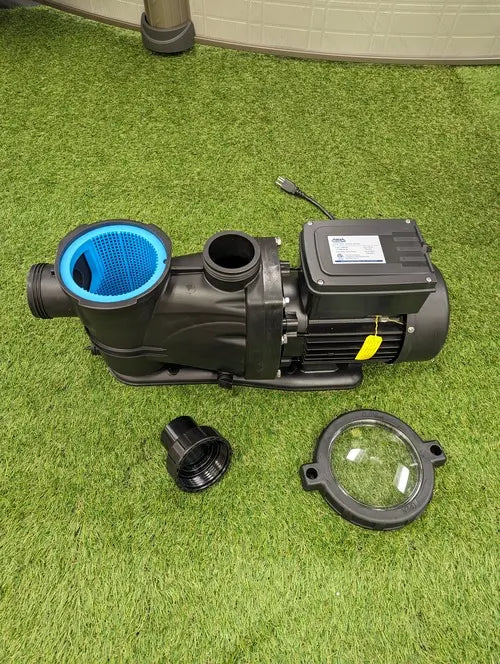
Check Contents of Pump Box
The following contents are included in the Pump Box:
- AquaPro 2HP 2-SPEED PurFlo Above Ground Pool Pump
- Union Adapter Kit with O-ring
- Strainer Lid Cover and Locking Ring (O-ring already installed on cover)
Connnecting Your Filter Tank and Pump to the Base
Step 1 - Scroll through the steps by clicking on the arrow in each image.
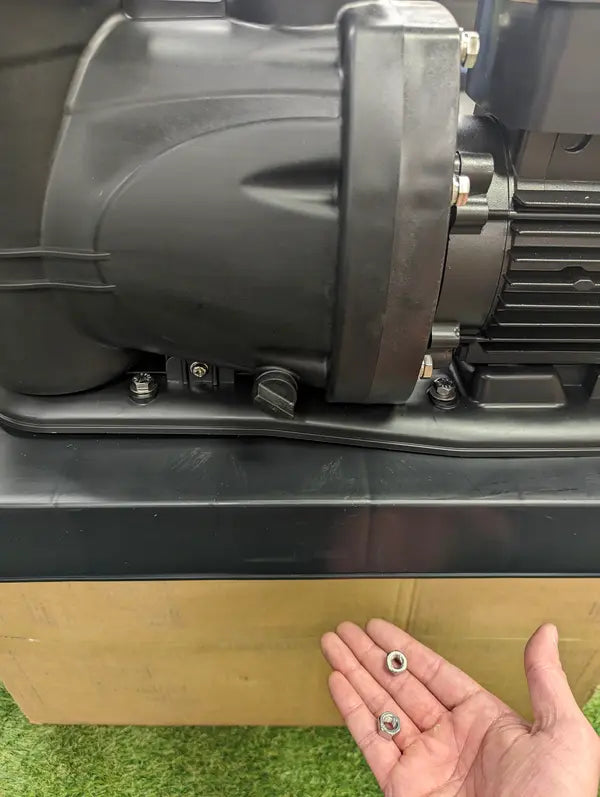
Use the filter box to help support the filter system during the installation process. Set pump on top of the base and align the holes.
Step 2
Use (2) bolts, washers and nuts to attach the pump to the base on one side.
Step 3
Turn the base to the opposite direction and use (2) more bolts, washers and nuts (4 in total) to attach the pump to the base.

Step 4
Slide the base further onto the box so the pump is supported and you can gain access to the holes for the filter tank.
Step 5
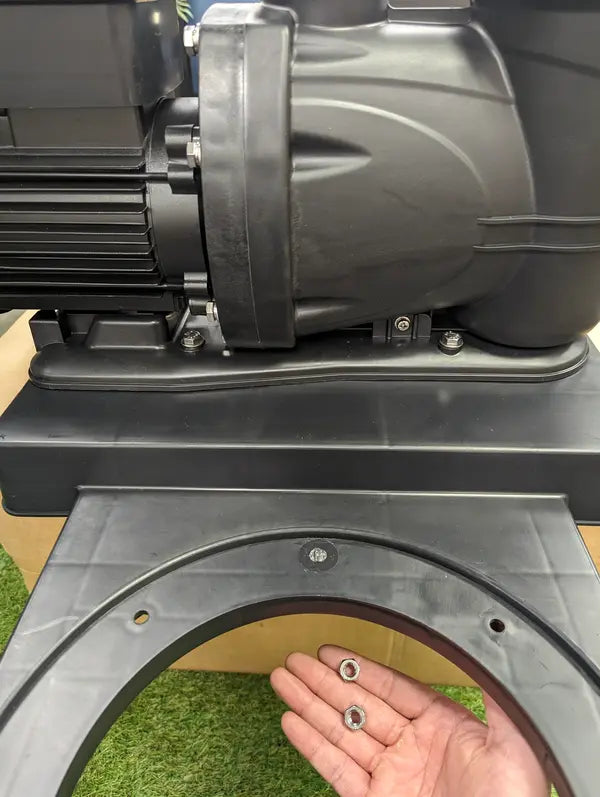
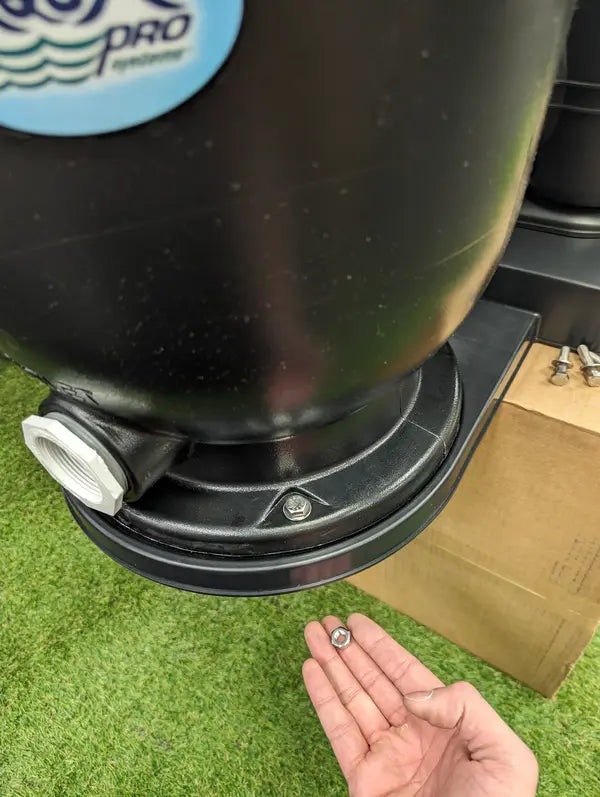
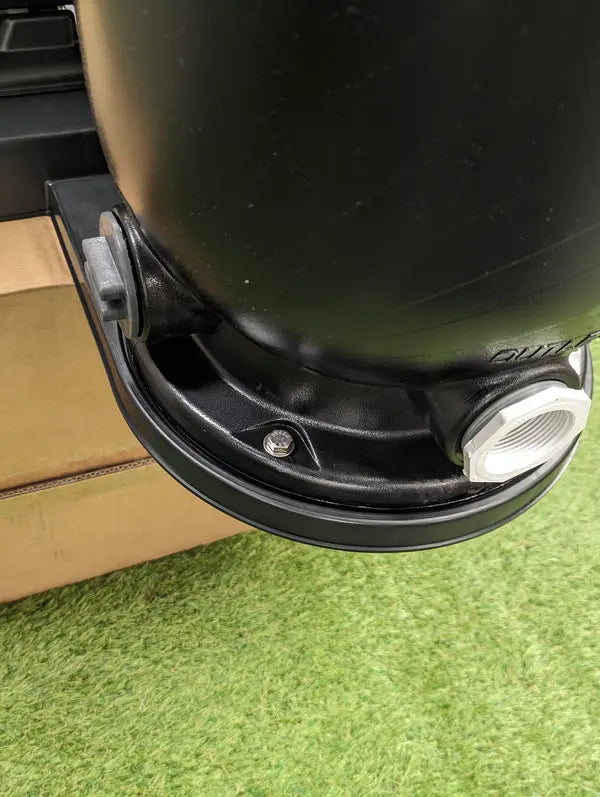
Place the filter tank on the base so that the INLET port is facing the pump and the OUTLET port is facing away from the pump. Align the holes and attach using a bolt, washer and nut.
Step 6
Use the additonal bolts, washers and nuts to secure the Filter Tank to the Base.

Step 7
The Filter Tank should be connected to the Base with (4) total bolts, washers and nuts.
Filter Tank and Pump attached to Base.
Scroll →
Step 1
Use the filter box to help support the filter system during the installation process. Set pump on top of the base and align the holes.
← Scroll →
Step 2
Use (2) bolts, washers and nuts to attach the pump to the base on one side.
← Scroll →
Step 3
Turn the base to the opposite direction and use (2) more bolts, washers and nuts (4 in total) to attach the pump to the base.
← Scroll →
Step 4
Slide the base further onto the box so the pump is supported and you can gain access to the holes for the filter tank.
← Scroll →
Step 5
Place the filter tank on the base so that the INLET port is facing the pump and the OUTLET port is facing away from the pump. Align the holes and attach using a bolt, washer and nut.
← Scroll →
Step 6
Use the additonal bolts, washers and nuts to secure the Filter Tank to the Base.
← Scroll →
Step 7
The Filter Tank should be connected to the Base with (4) total bolts, washers and nuts.
← Scroll
Filter Tank and Pump attached to Base.
Connnecting Your Pump to the Filter Tank and Swimming Pool
Step 1 - Scroll through the steps by clicking on the arrow in each image.
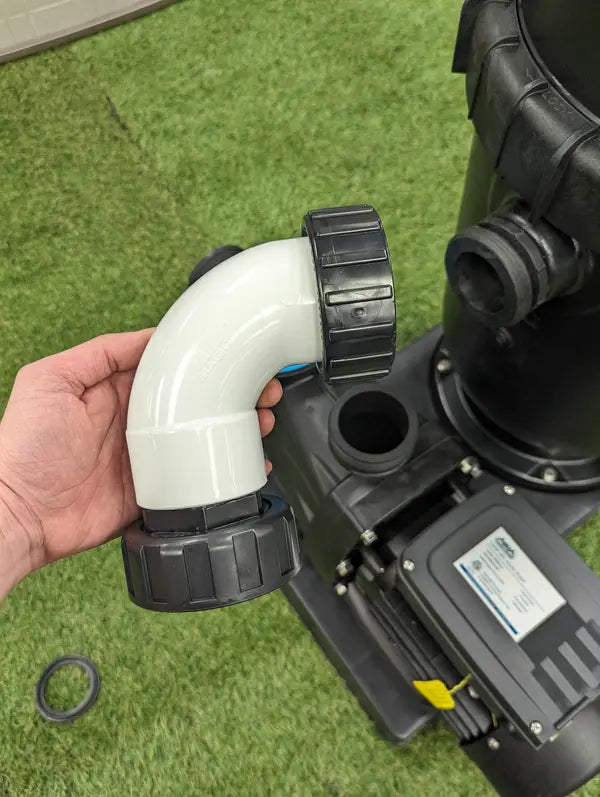
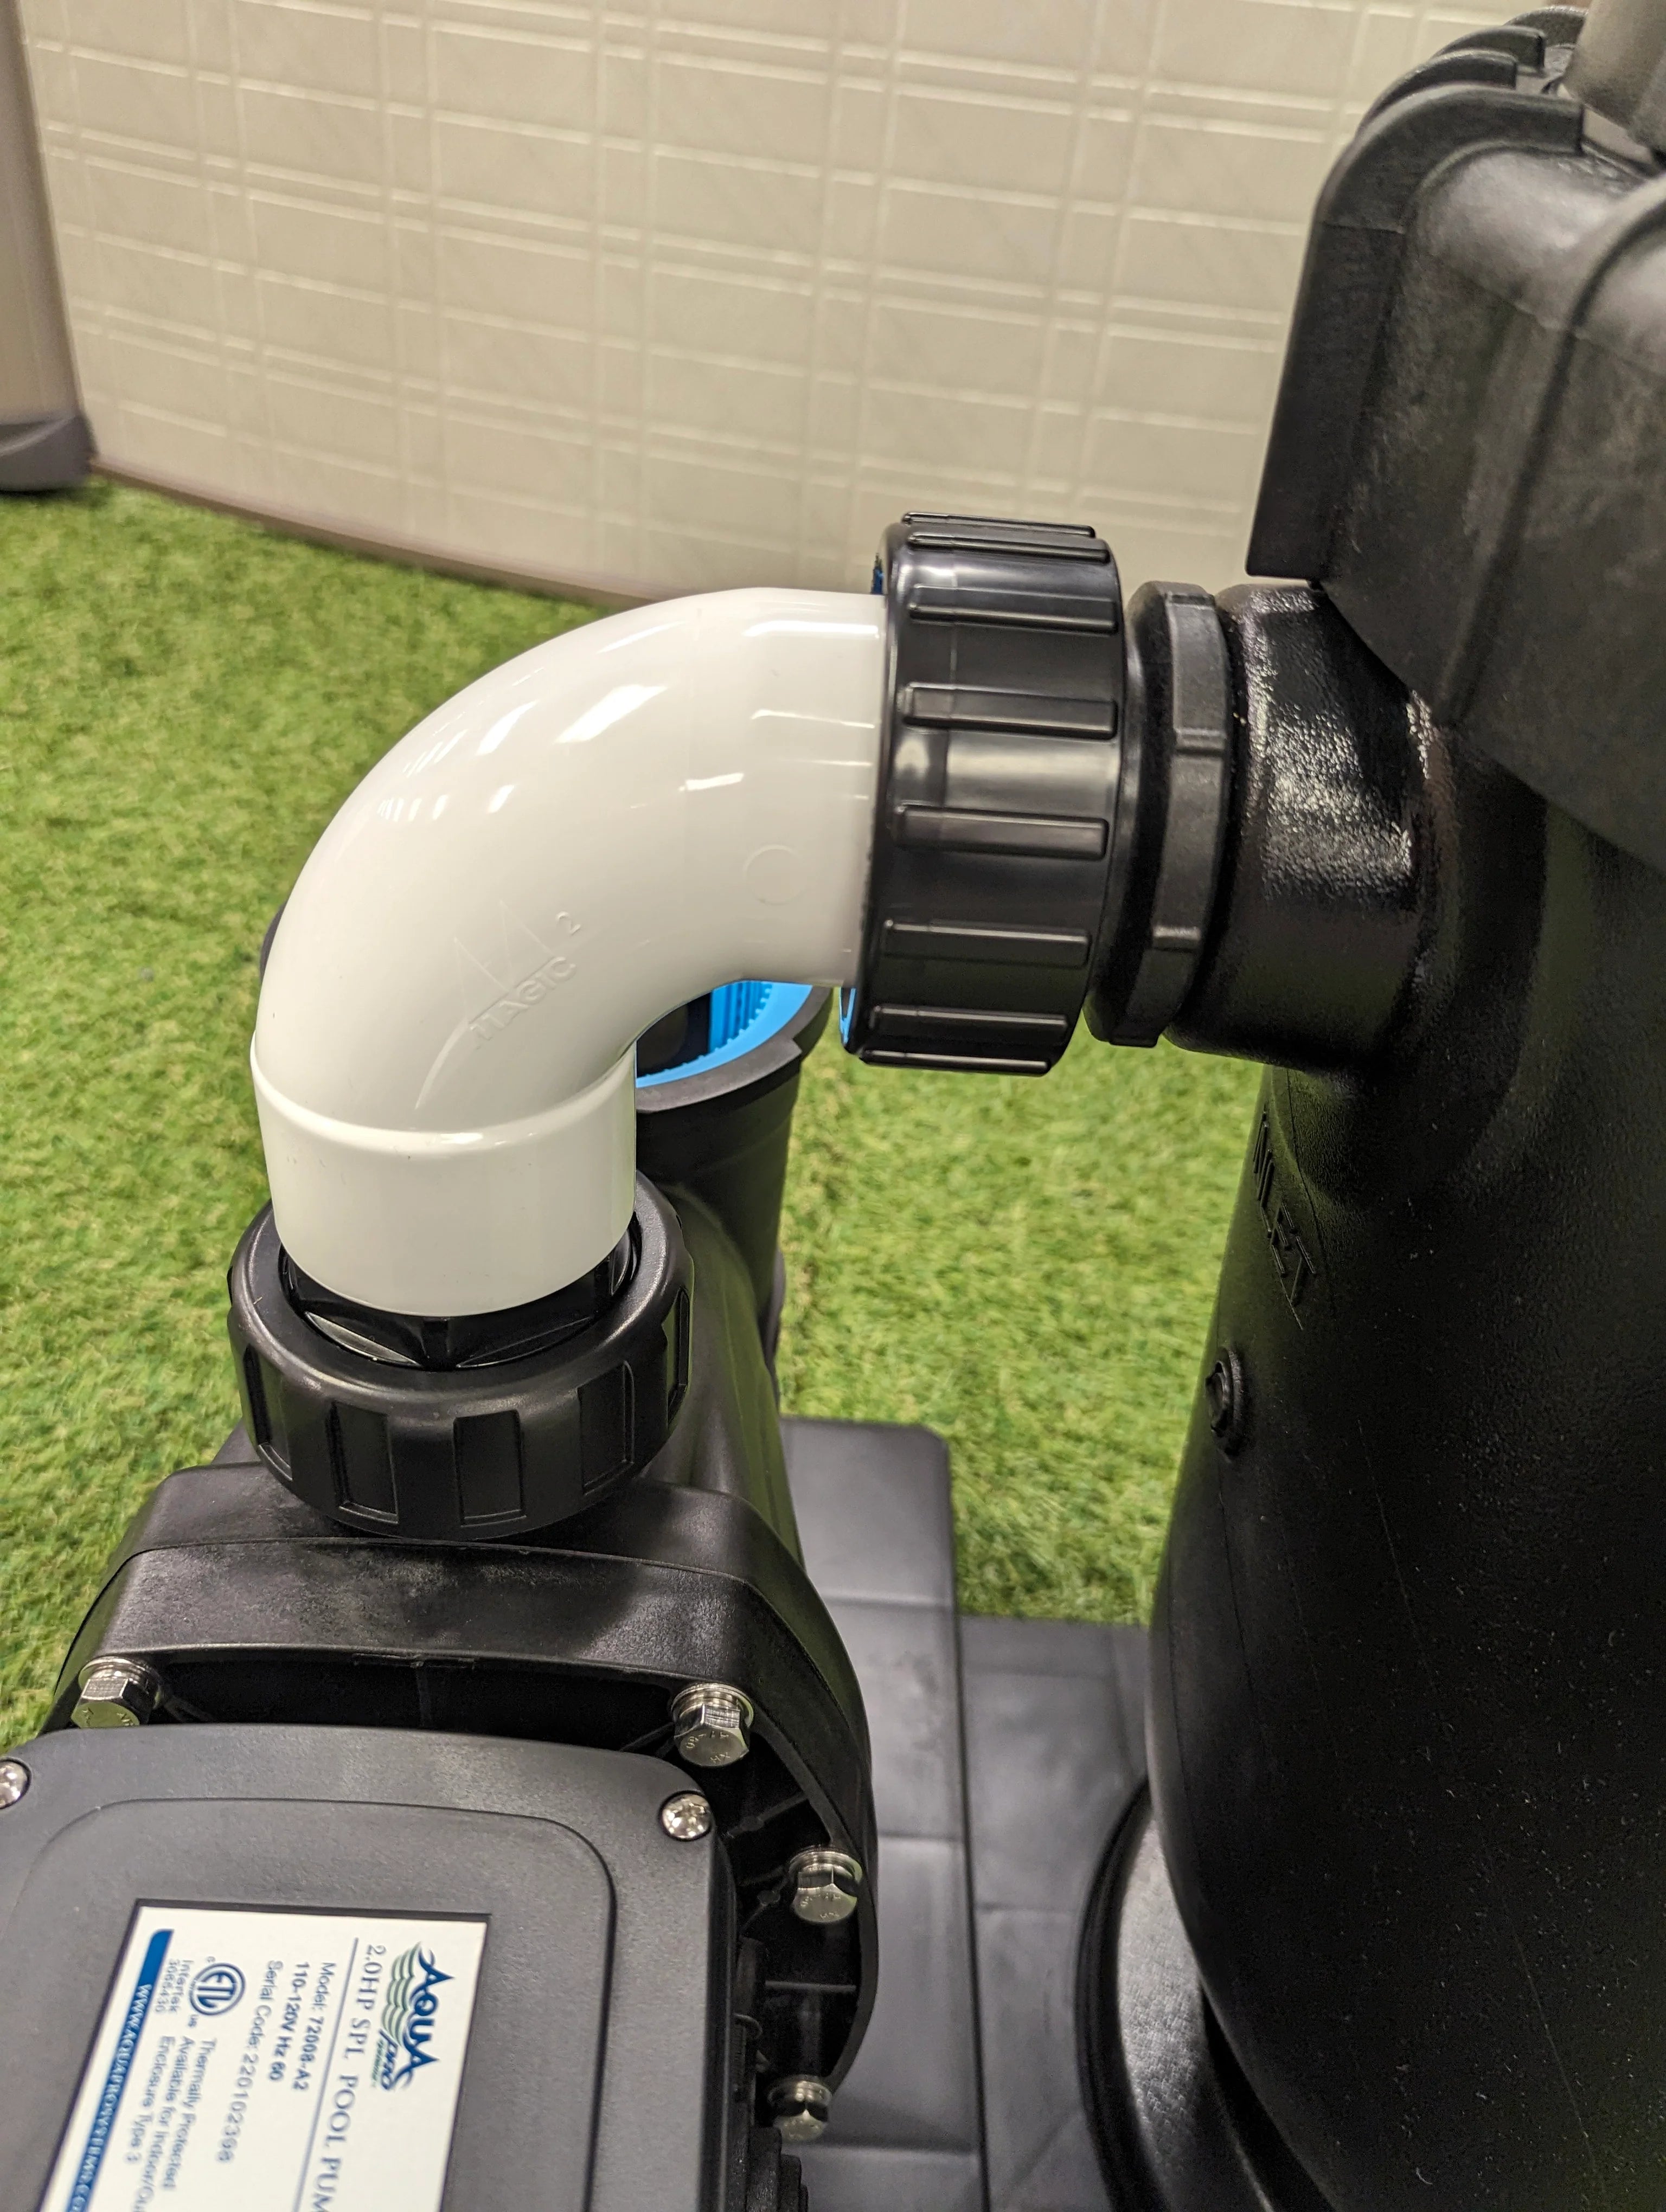
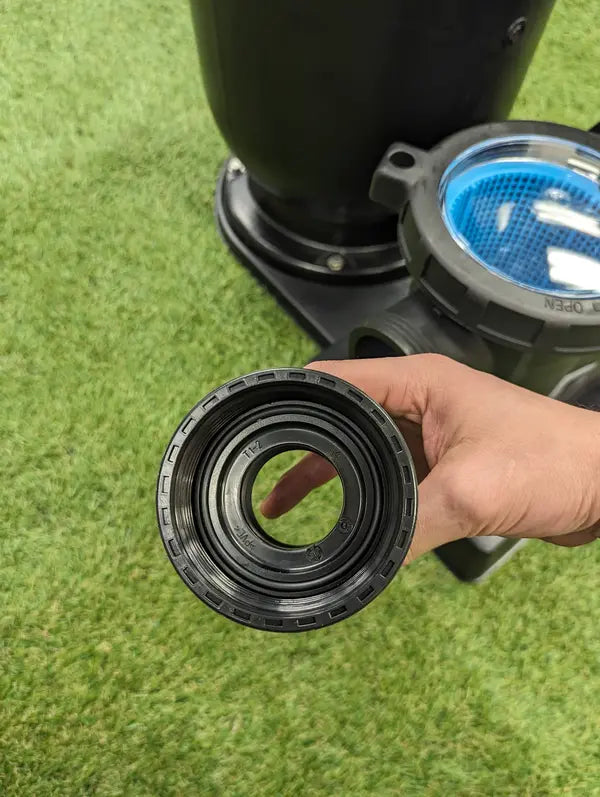
Identify your Pump to Filter Unionized Elbow.
Step 2
Identify the Gasket for the AquaPro Pump To Filter Unionized Elbow.
Step 3
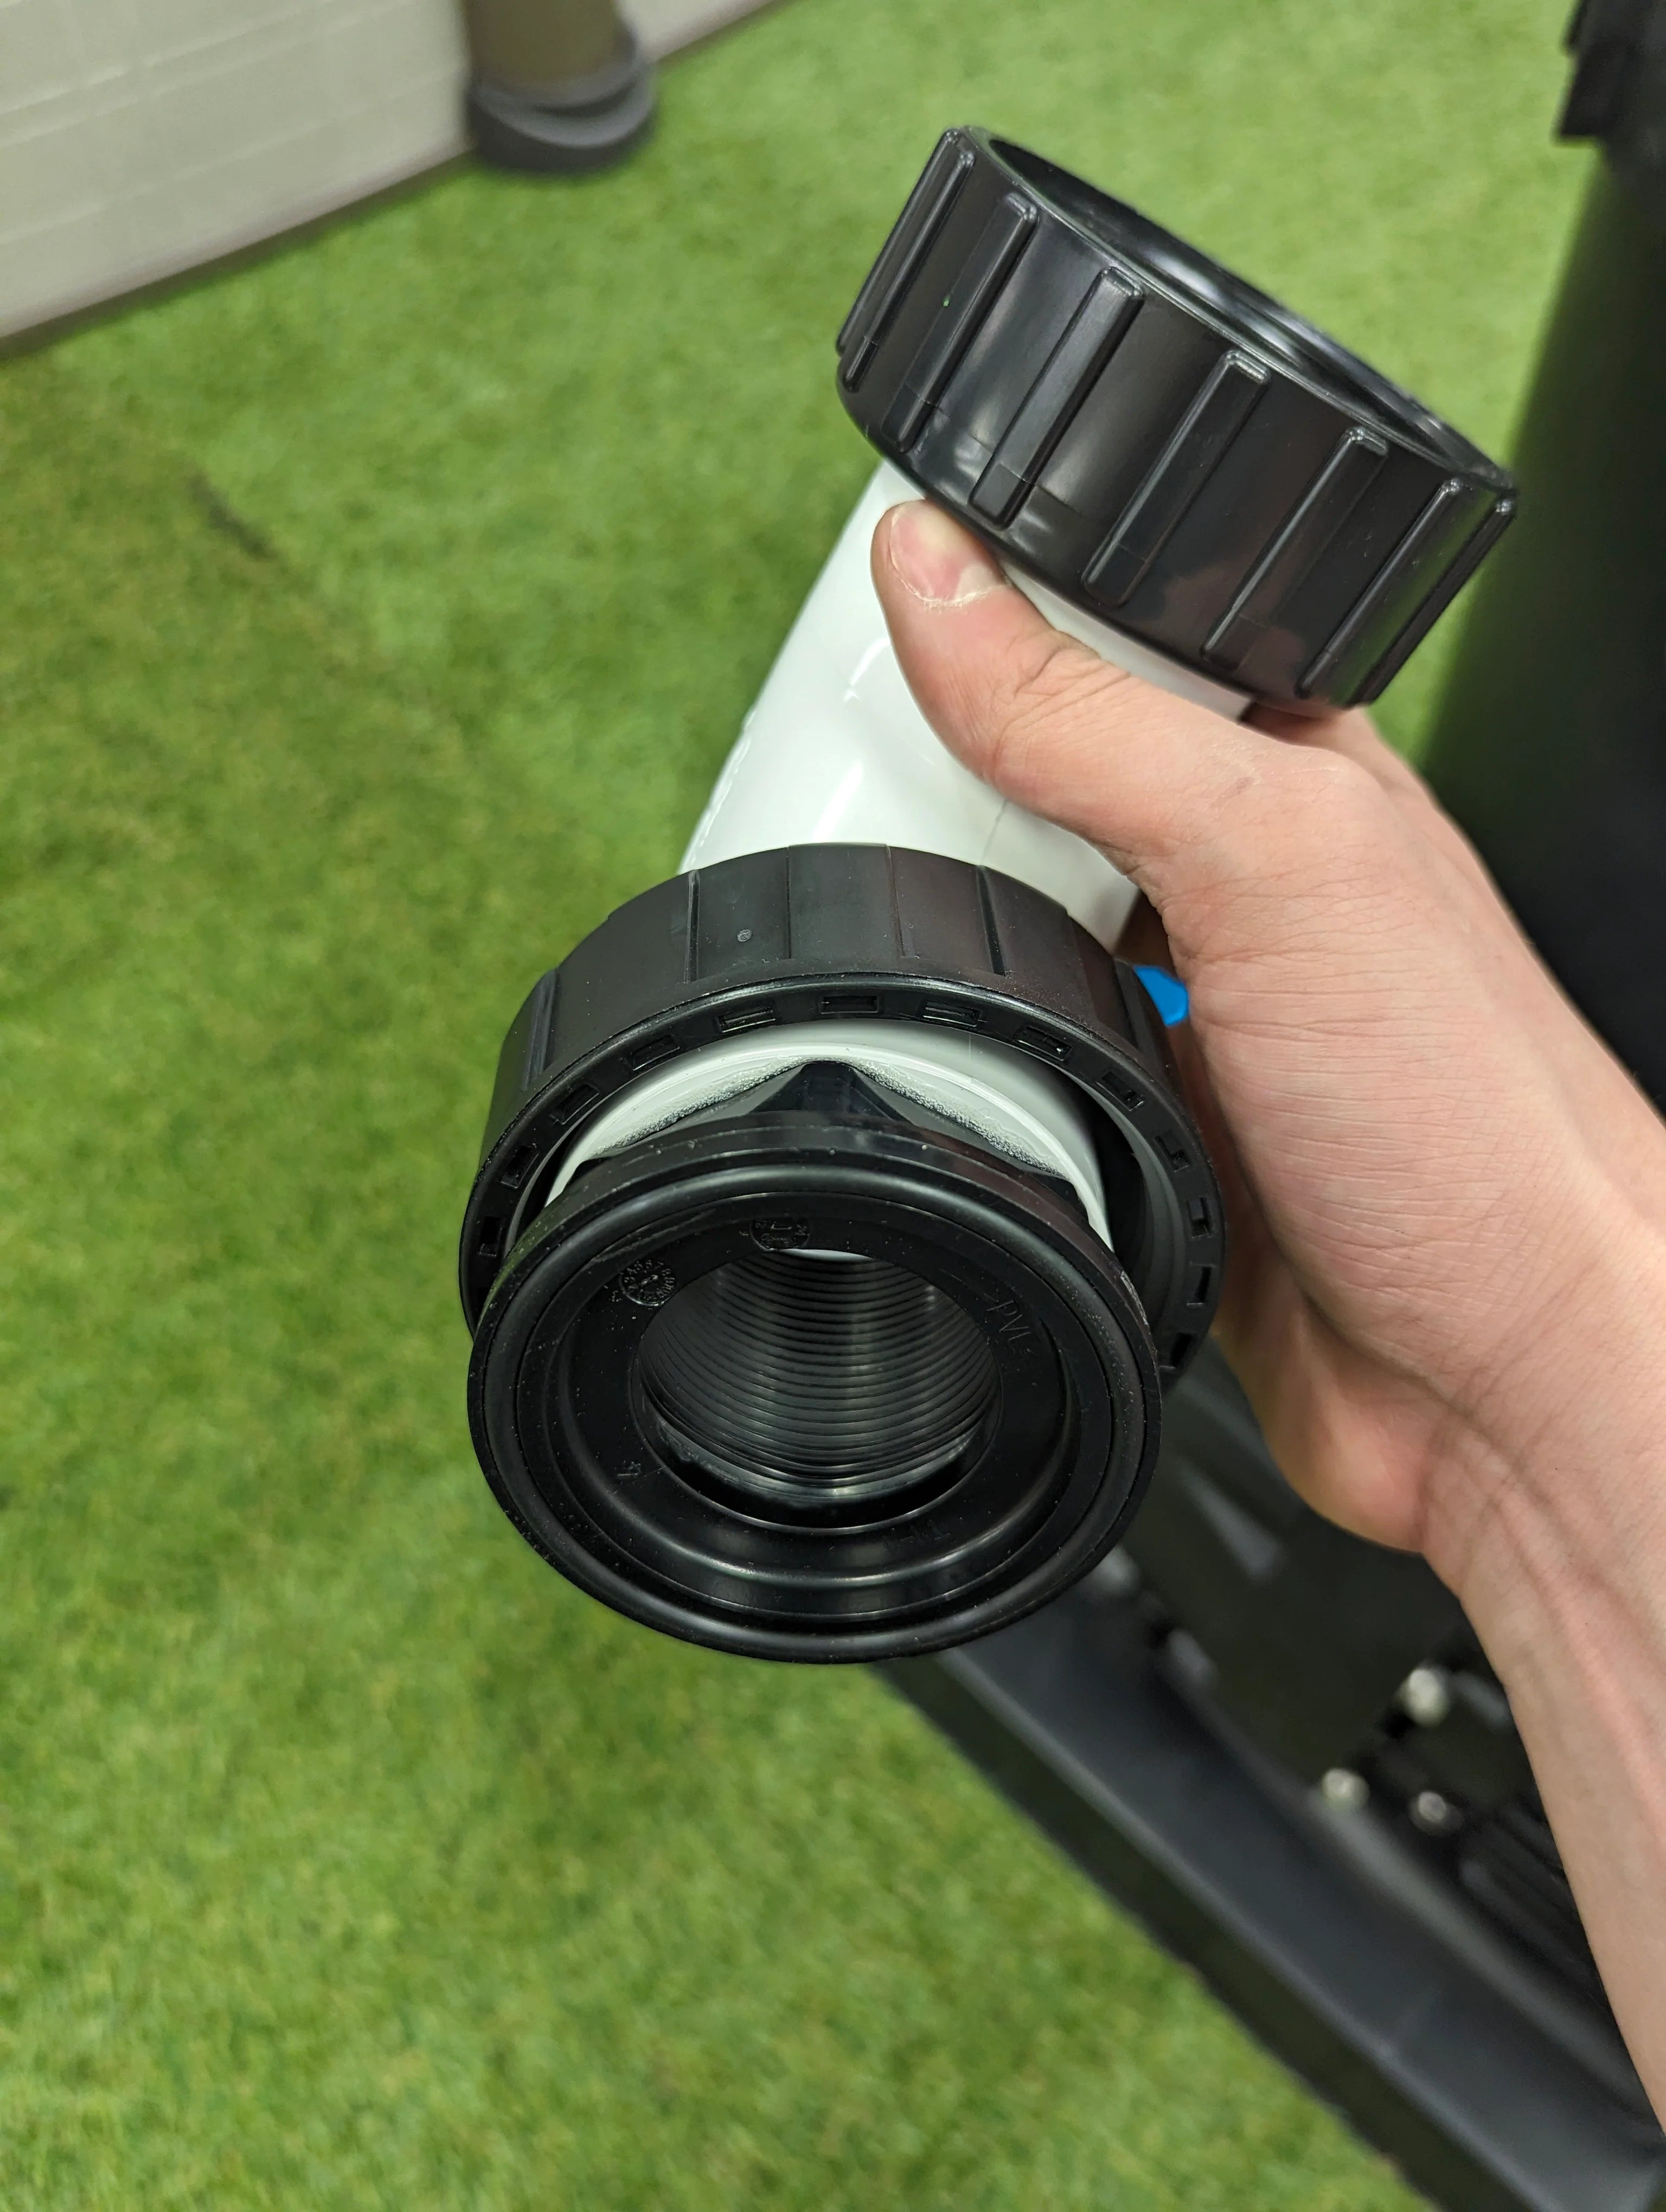
Insert the gasket into the groove on the white side of the elbow.
Step 4
Make sure the o-ring is already installed on the other (black) end of the elbow.
Step 5
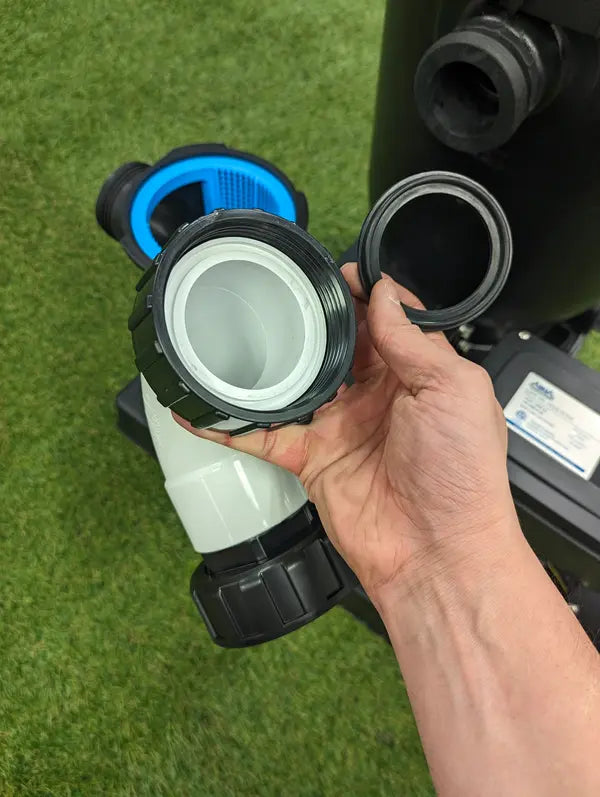
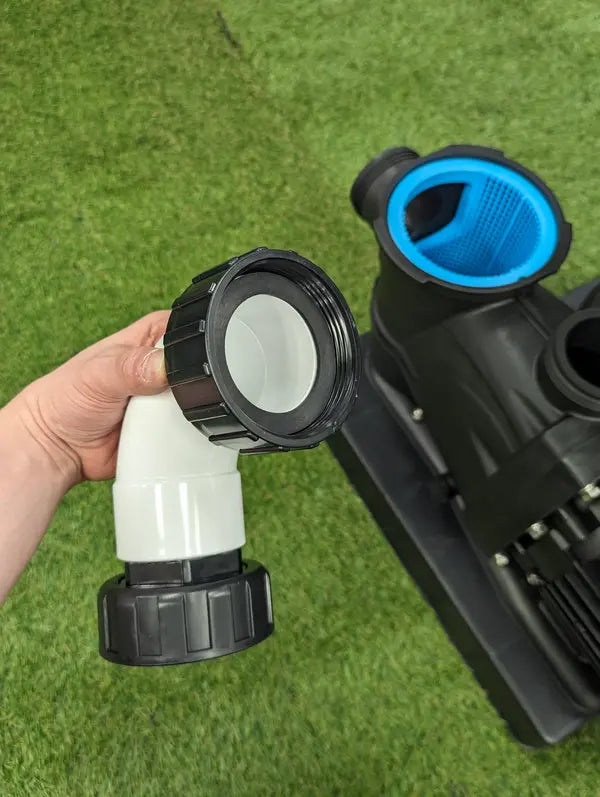
Install the Pump to Filter Unionized Elbow connection to the top of the pump and the side of the filter tank (INLET). The side with the gasket attaches to the filter tank and the other end with the o-ring attaches to the pump.
Step 6
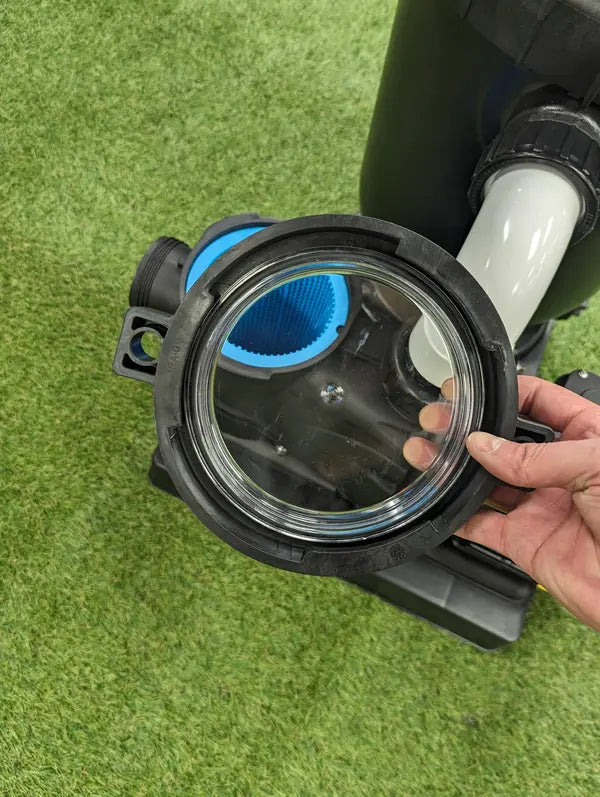
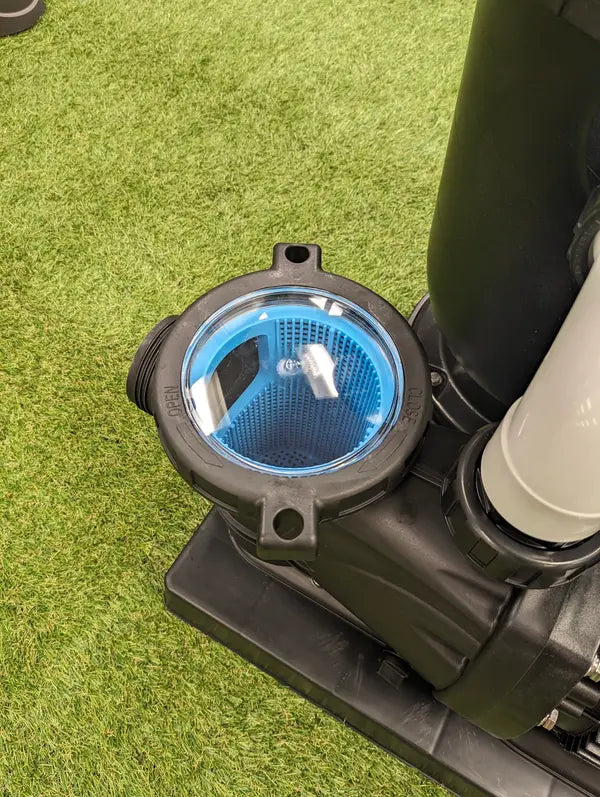
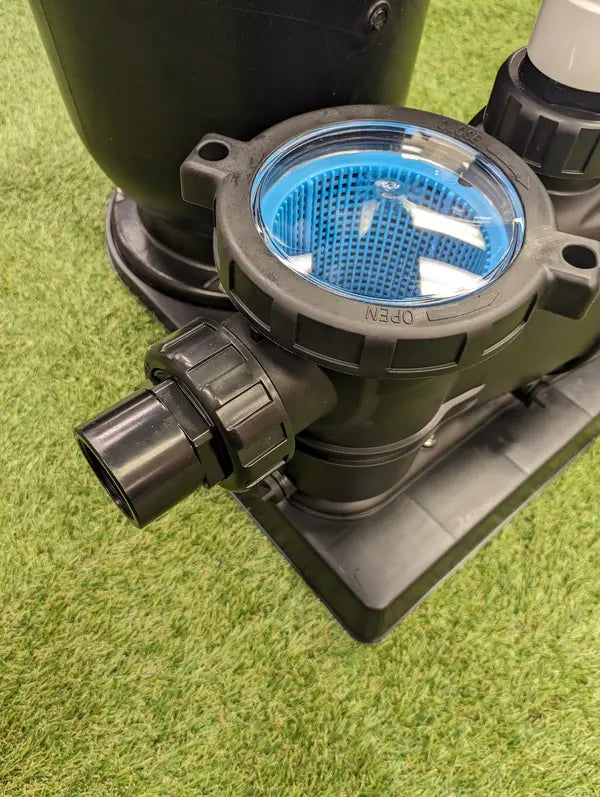
Identify the Strainer Lid Cover and Locking Ring. The required o-ring is already installed on the lid cover.
Step 7
Place the strainer lid assembly on top of the Strainer Housing and secure with half a turn. You'll notice the lock ring shows you the direction to close the lid.
Step 8
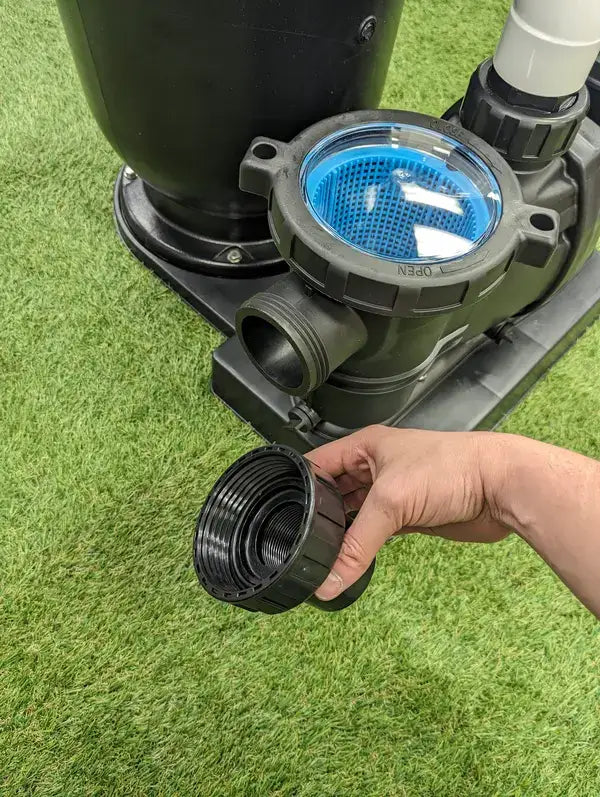
Identify your Union Adapter Kit with O-Ring.
Step 9
The required o-ring is already installed in the union adapter.
Step 10
Install the union adapter on the front of the pump (strainer housing). Screw on hand-tight.
Step 11
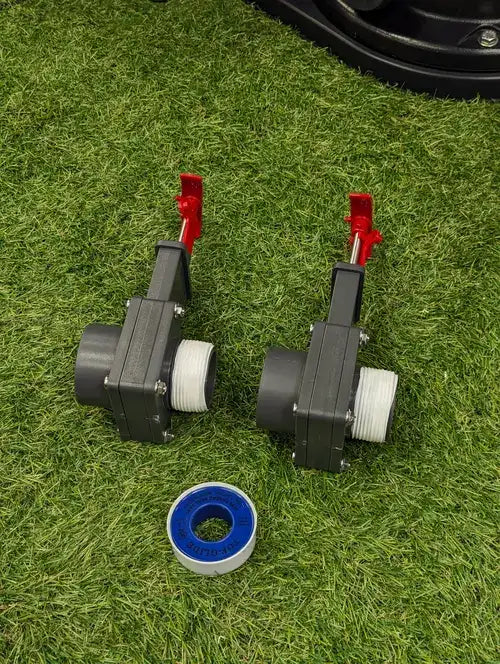
Apply teflon tape to both shut off valves.
Step 12
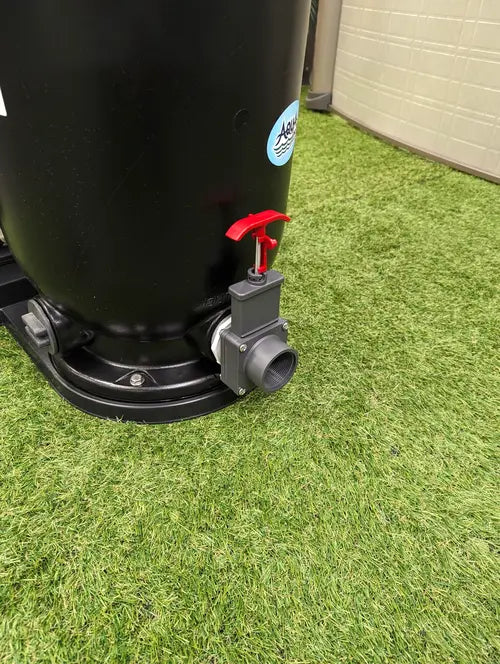
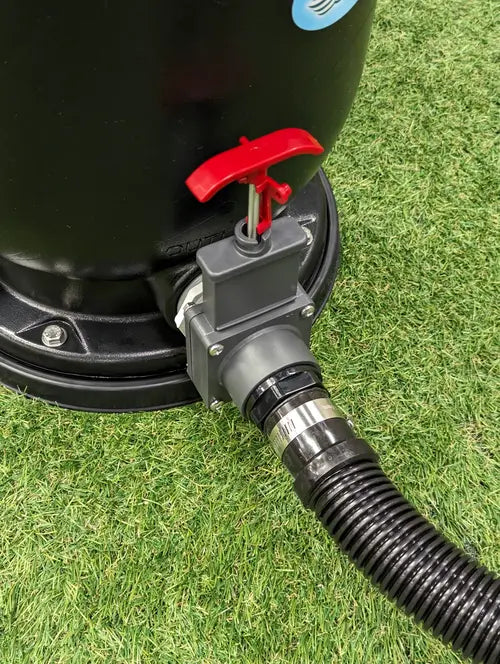
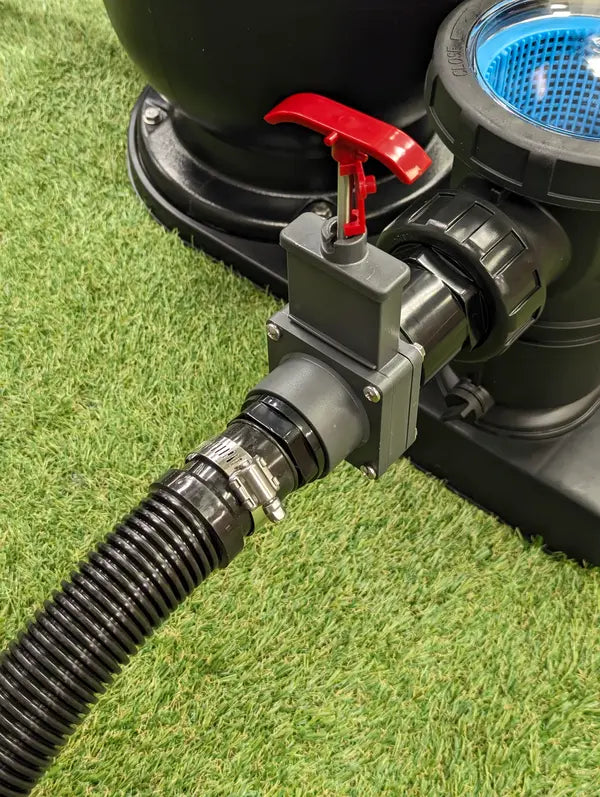
Screw (hand-tight) the first shut off valve into the reducer fitting on the bottom of the filter tank (OUTLET).
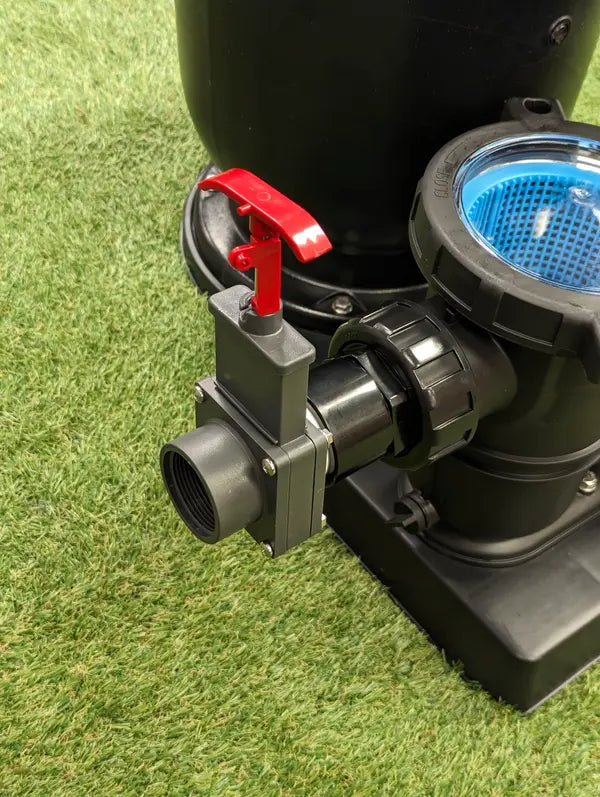
Step 13
Screw (hand-tight) the second shut off valve into the union adapter on the front of the pump.
Step 14
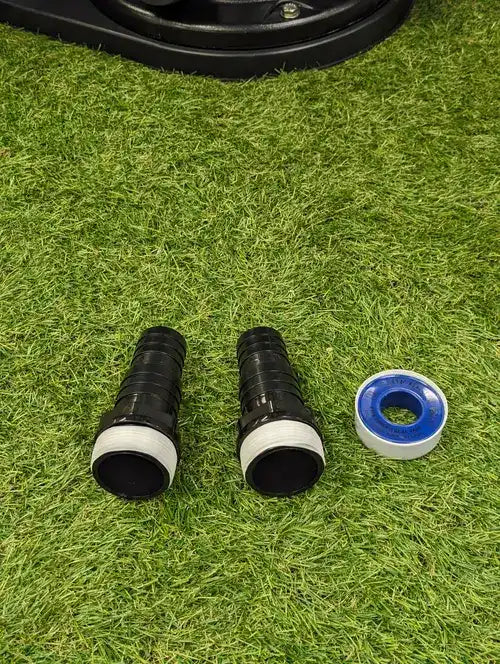
Apply teflon tape to the threads of the hose barb adapters.

Step 15
Screw (hand-tight) one of the hose barb adapters into the shut off valve on the filter tank.
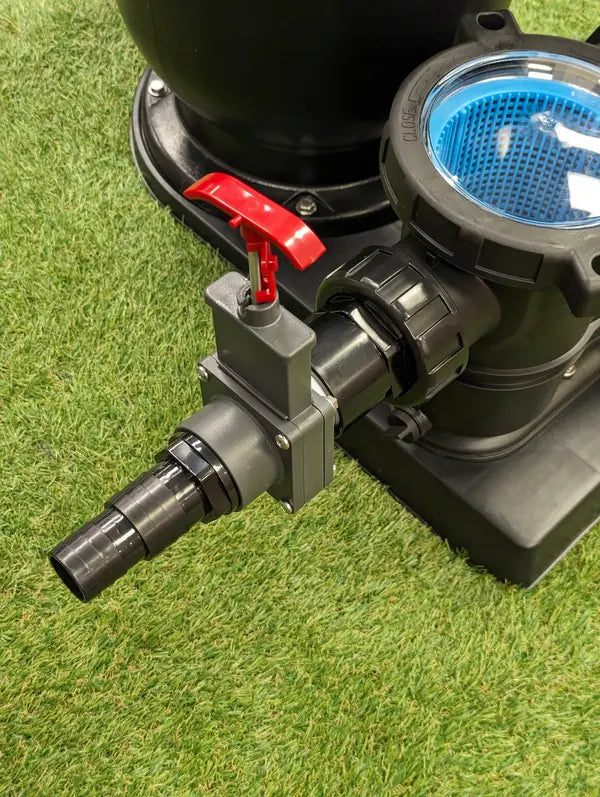
Step 16
Screw (hand-tight) the other hose barb adapter into the shut off valve on the pump.

Step 17
Apply teflon tape to the threads of the pressure gauge.
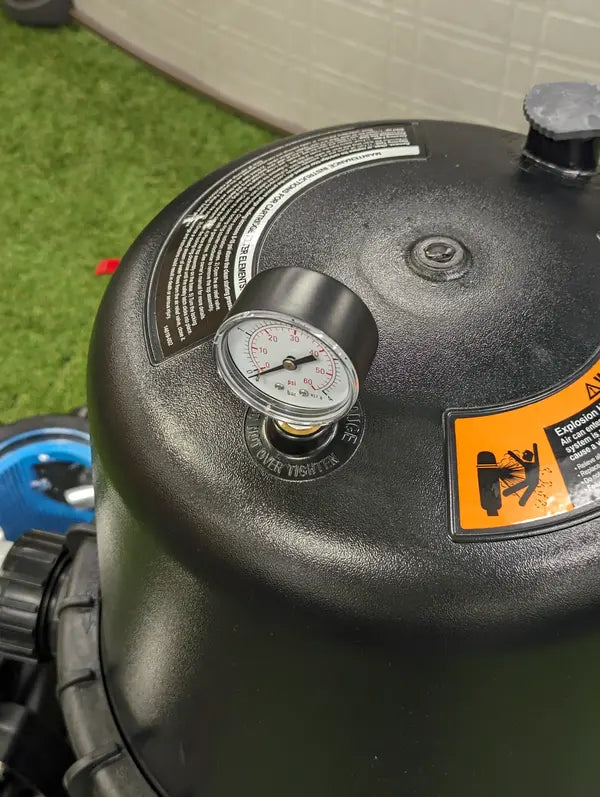
Step 18
Carefully screw gauge into the threaded hole at the top of the filter.
Step 19
Attach the first 6ft filter hose to the hose fitting on the filter tank and secure using a hose clamp.
Step 20
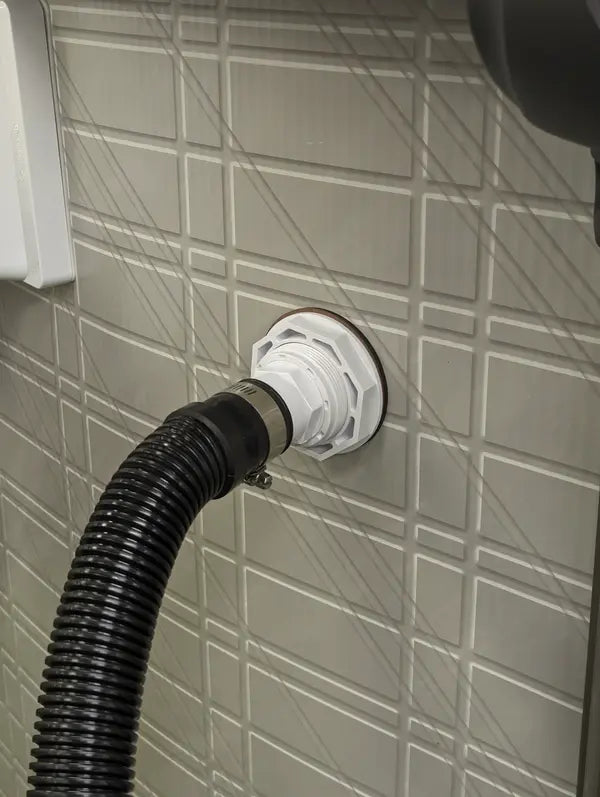
Connect the other end of the 6ft filter hose to the hose fitting at the return jet of the pool. Secure with hose clamp.
Step 21
Attach the second 6ft filter hose to the hose fitting on the pump and secure with a hose clamp.
Step 22
Attach the other end of the 6ft hose to the hose fitting at the bottom of the thru-wall skimmer on the pool. Secure with hose clamp.

Step 1
Apply teflon tape to the threads of one of the Barbed Hose Fittings.

Step 2
Insert the Barbed Hose Fitting into the internal threads of the Union Adapter located on the strainer housing (front of pump).

Step 3
Slide one end of the 6ft Hose over the Barbed Hose Fitting and secure it using a Hose Clamp.

Step 4
Attach the other end of the 6ft Hose to your thru-wall skimmer's hose adapter using a hose clamp. Installation of the first filter hose is complete.

Step 5
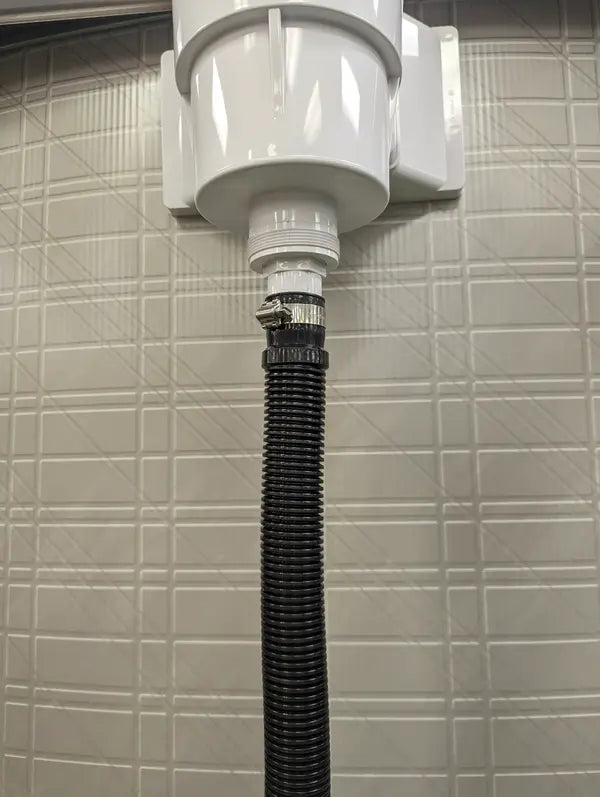
Locate the port on your 7-Way Top Mount Valve that says "PUMP".

Step 6
Apply teflon tape to the threads of the High Pressure Hose Adapter Fitting.

Step 7
Insert and screw the High Pressure Hose Adapter Fitting into the port labeled "PUMP".

Step 8
Identify your High Pressure Pump to Filter Hose Assembly. The Union Nut on the hose assembly must be at the top.
Connnecting Your Pump to the Filter Tank and Swimming Pool
Scroll through the images below to view the step-by-step process.
Scroll →
Step 1
Identify your Pump to Filter Unionized Elbow.
← Scroll →
Step 2
Identify the Gasket for the AquaPro Pump To Filter Unionized Elbow.
← Scroll →
Step 3
Insert the gasket into the groove on the white side of the elbow.
← Scroll →
Step 4
Make sure the o-ring is already installed on the other (black) end of the elbow.
← Scroll →
Step 5
Install the Pump to Filter Unionized Elbow connection to the top of the pump and the side of the filter tank (INLET). The side with the gasket attaches to the filter tank and the other end with the o-ring attaches to the pump.
← Scroll →
Step 6
Identify the Strainer Lid Cover and Locking Ring. The required o-ring is already installed on the lid cover.
← Scroll →
Step 7
Place the strainer lid assembly on top of the Strainer Housing and secure with half a turn. You'll notice the lock ring shows you the direction to close the lid.
← Scroll →
Step 8
Identify your Union Adapter Kit with O-Ring.
← Scroll →
Step 9
The required o-ring is already installed in the union adapter.
← Scroll →
Step 10
Install the union adapter on the front of the pump (strainer housing). Screw on hand-tight.
← Scroll →
Step 11
Apply teflon tape to both shut off valves.
← Scroll →
Step 12
Screw (hand-tight) the first shut off valve into the reducer fitting on the bottom of the filter tank (OUTLET).
← Scroll →
Step 13
Screw (hand-tight) the second shut off valve into the union adapter on the front of the pump.
← Scroll →
Step 14
Apply teflon tape to the threads of the hose barb adapters.
← Scroll →
Step 15
Screw (hand-tight) one of the hose barb adapters into the shut off valve on the filter tank.
← Scroll →
Step 16
Screw (hand-tight) the other hose barb adapter into the shut off valve on the pump.
← Scroll →
Step 17
Apply teflon tape to the threads of the pressure gauge.
← Scroll →
Step 18
Carefully screw gauge into the threaded hole at the top of the filter.
← Scroll →
Step 19
Attach the first 6ft filter hose to the hose fitting on the filter tank and secure using a hose clamp.
← Scroll →
Step 20
Connect the other end of the 6ft filter hose to the hose fitting at the return jet of the pool. Secure with hose clamp.
← Scroll →
Step 21
Attach the second 6ft filter hose to the hose fitting on the pump and secure with a hose clamp.
← Scroll
Step 22
Attach the other end of the 6ft hose to the hose fitting at the bottom of the thru-wall skimmer on the pool. Secure with hose clamp.
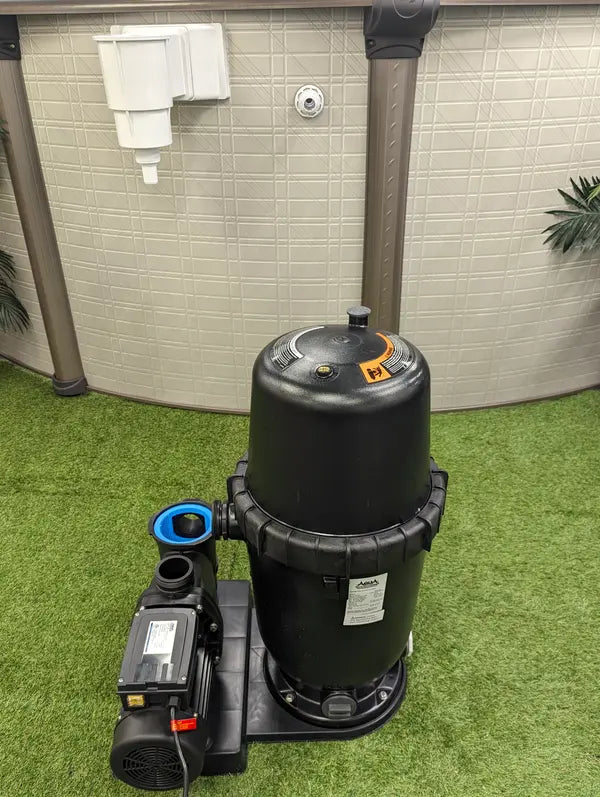
Completed installation of the AquaPro 190 Cartridge Filter System.

Replacement Filter Cartridge for AquaPro 190 SQ. FT.
Original replacement pool filter cartridge for the Aquapro 190 sq ft filter system. Made with Premium Pleatco Advanced filtration media for long life. Cartridge measures 24 1/4" high and 9 3/4" in diameter and is made specifically for the AquaPro 190 system.


